V-Strom (DL-1000/DL-650) Raising/Lowering Links
Out of Stock
I'm no longer making or selling lowering and raising links.
I don't plan to have more available in the future. If you're looking for
lowering links, you might want to look at
KoubaLink.com.
If you're looking for raising links, I'm sorry but I don't know of any options
right now.
Links
I used to manufacture and sell raising and lowering links ("dog-bones") for the
Suzuki
V-Strom.
Item
|
-8mm
linkage set - raises rear
of bike by 7/8 inch
Out of Stock!
|
-6mm
linkage set - raises rear
of bike by 5/8 inch
Out of Stock!
|
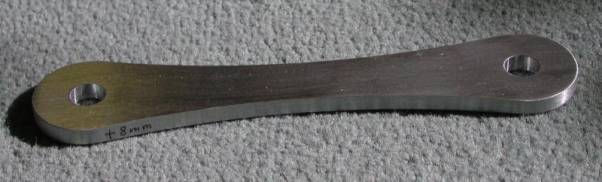
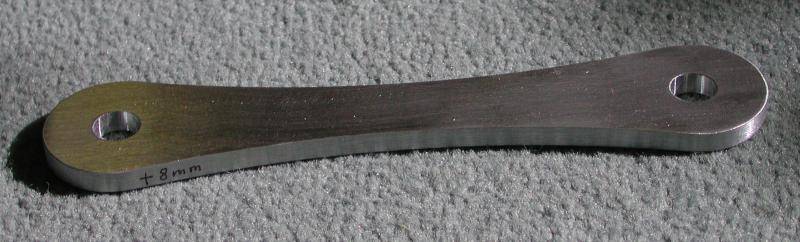
+8mm
linkage set - lowers rear
of bike by 7/8 inch
Out of Stock!
|
Rear
shock preload spacer - adds
3 lines of preload
Out of Stock!
|
It is possible to make links to raise or lower the bike more, but I
won't do it. More than 7/8" of raising/lowering is likely to
cause problems with the sidestand and centerstand. More than 7/8"
of lowering may let the tire hit the inside of the fender at extreme
suspension travel. And it is impossible to lower the front end
enough to compensate for more than 7/8" of lowering, possibly causing
handling problems.
What They Are
The links are CNC-machined from 7075-T6 aluminum (the strongest
easily machinable aluminum available), and simply bolt in place of the
stock linkages. Here is a photo with, from left to right, a pair
of the stock steel links, a pair of my -8mm raising links, a pair of my
-6mm raising links, and a pair of my +8mm lowering links.

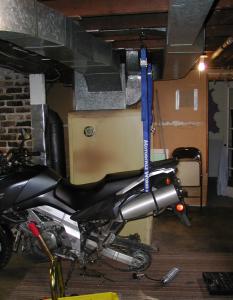
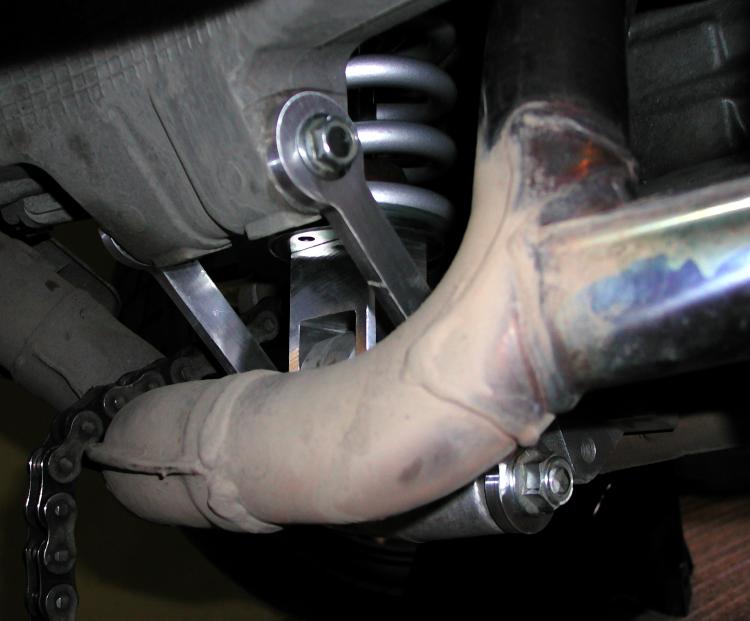
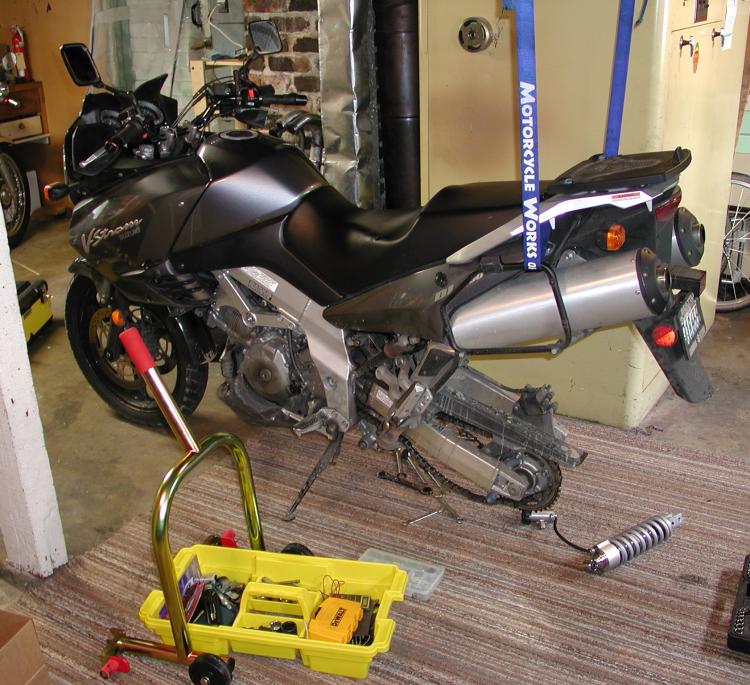
Below is a picture of the links installed on the bike (note that these
are a slightly different shaped set of prototype links). Also,
the preload
spacer added to my shock.
I've put a lot of effort into making sure that these links will take
all of the abuse that a 'Strom could put out over hundreds of thousands
of miles. They're actually somewhat beefier than the stock
linkages, although since they're made of aluminum they're about half
the weight.
What They're For
- Raising the rear of the 'Strom gives a considerable increase in
cornering clearance. Before I raised my bike, I was scraping pegs
fairly often on sporting rides. With the extra ride height I very
rarely scrape a peg. The bike feels a bit more agile at speed -
presumably a similar effect to lowering the front end. The -6mm
feels a little more planted than the -8mm, so I recommend the -6mm, but
if you want all the ride height you can get, you might want the
-8mm. It does make the bike quite tall - I have a 33-34" inseam,
and I can just flatfoot the bike. I don't think I'd recommend it
to those with less than a 32" inseam. The bike leans slightly
further over on the sidestand, but is perfectly secure. A
centerstand should continue to work.
- Lowering the rear of the 'Strom will make it that much easier to
reach the ground, at the expense of reduced cornering clearance.
If you're not comfortable with the amount of foot you can get down at
stops, I would recommend lowering the bike until you're more
comfortable with the bike, and then swapping back to the stock
linkages. Sidestand and centerstand will continue to work, but
it'll be more difficult to get the bike on a centerstand.
- A preload spacer adds preload to the rear shock. I found
that the rear shock was too soft to adjust for myself and a passenger -
I had the preload cranked up to the max with just me. The spacer
adds the equivalent of 3 lines of preload. For me (~190 lbs) this
makes 1 line of preload showing about right, and with a ~140 lbs
passenger, 4 lines of preload are about right.
Linkage Installation
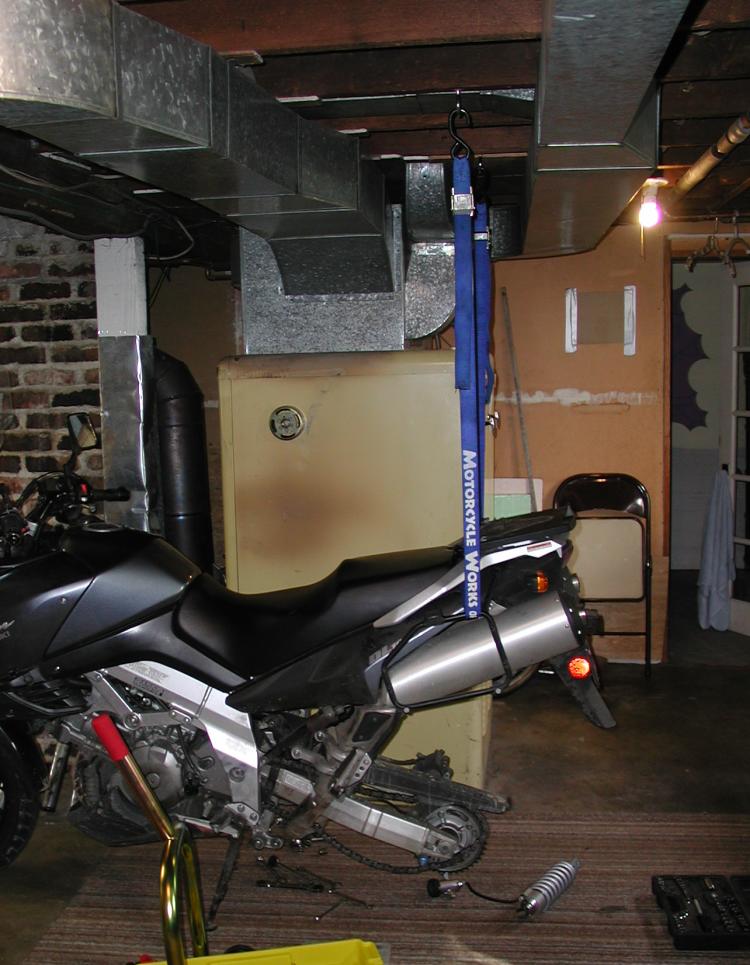
Changing the linkages just requires a centerstand, or hanging the
rear
of the bike from the ceiling (that's what I did). Once the rear
of
the bike is supported, it's a 15-minute job requiring only a socket
wrench.

- Put the bike on the centerstand, or hang it from the
ceiling. Note that sidestand or a track stand won't work, because
soon the swingarm will be disconnected from the rear shock.
- Remove the rear wheel. It might be possible to swap the
linkages out with the wheel in place, but it would probably be
significantly more awkward.
- The stock linkages are held in place with bolts with 14mm heads
and 17mm nuts. Use a 14mm wrench and 17mm socket to remove the
nuts, and pull the bolts out. They're the same length, so you
don't need to keep track of which is which.
- Set the stock linkages aside and install the new linkages with
the bolts.
- Apply a drop or two of blue (medium-strength) Lock-Tite to the
threads of the nuts for good measure, and tighten them down. The
shop manual specifies 56.5 lb-ft (78 N-m) of torque for these
nuts.
- Reinstall the rear wheel. You're done! Enjoy your now
taller (or shorter) bike.
If you installed raising links, please note that raising the rear of
the bike has a similar affect to lowering the front of the bike.
If you raise the rear of the bike I recommend you leave the fork tubes
in their stock location in the triple clamp; otherwise the bike's
handling may become unstable. If you've raised the fork tubes in
the triple clamps, now is the time to return them to normal.
If you installed lowering links, it may be useful to lower the front of
the bike by raising the fork tubes in the triple clamps. You can
safely lower the front of the bike 15mm this way; if you attempt to
lower it more, the forks may hit the bottom triple clamp, causing
damage. See
the V-Strom FAQ for details on this modification.
Shock Spacer Installation
Warning: this procedure
involves uncommon tools (in particular, a hydraulic press or spring
compressor), and involves removing the shock spring, which has a
substantial amount of stored energy. If you mess up, you could
easily damage your shock or injure yourself. If you have doubts
about doing this procedure yourself, don't - any suspension shop and
most motorcycle shops should be able to do the work for you for a
nominal fee.
- Follow steps 1-3 of the linkage installation instructions to
remove the stock linkages from the bike.
- Remove the two bolts holding the preload adjuster knob in
place. The knob is attached to the shock by a rubber hose.
For now just let the knob dangle by the hose.
- The shock is held in place by a bolt and nut at the top and a
bolt and nut at the bottom. Remove the top bolt and nut.
They are very awkward to get to - you may need to use several socket
extensions to get at them.
- Remove the bottom shock nut and bolt. The pivot thingy
they're attached to should swing out of the way.
- Pull the shock out the bottom of the bike, carefully threading
the hose and preload knob to follow it. The top end of the shock
may be wedged in its mounting point - I had to use a hammer to persuade
the shock to leave.
- Turn the preload knob as far counter-clockwise as it will
go. There should be no lines of preload showing on the preload
piston. This puts the least possible tension on the spring.
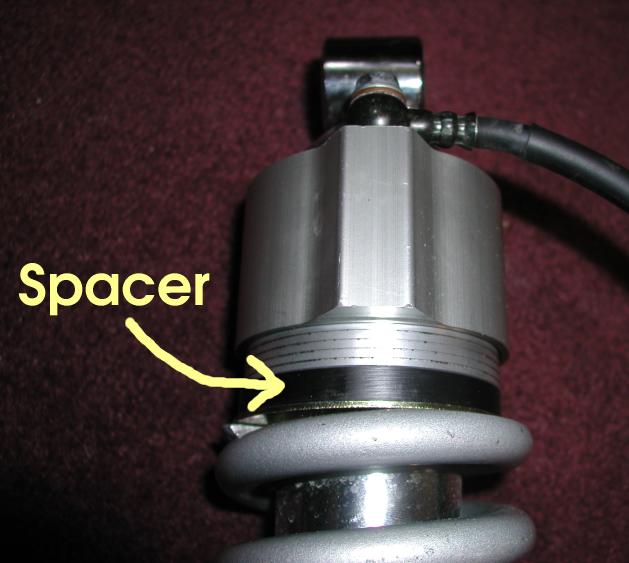
- Terminology time: see this
picture. From bottom to top, we have: the spring, the spring
cap, my spacer (black), the preload piston (not visible on your shock,
because you retracted it in the previous step), the preload cylinder
(which the host attaches to), and at the end the mounting point.
And in the center of this is the shock body. Yes, I'm making all
of these terms up.
- Look around the edge of the preload cylinder - there is a small
hole, which houses a set screw, which keeps the preload cylinder from
rotating around the shock body. Make note of the orientation of
the cylinder around the body - you might want to use a magic marker to
mark them. Then use a tiny allen wrench to loosen the set
screw. You don't need to remove it - a few turns will do.
- Now you need to find a way to press on the preload cylinder while
holding the shock body in place. I stuck a rod through the
mounting point, supported the rod on my hydraulic press, and use the
press to press on spacers which pressed on the preload cylinder.
I wish I'd taken pictures. Anyway, the goal is to press the
preload cylinder down about 1/4 inch on the shock body.
- Now there should be exposed a snap ring which seats in a groove
in the shock body. Remove the snap ring - I managed to get mine
out with a flat-blade screwdriver.
- With the snap-ring removed, release the pressure on the preload
cylinder. The shock spring will push it partially off the shock
body.
- Remove the shock from your press or spring compressor.
Everything should come apart easily now. Reassemble with my black
spacer between the spring cap and the preload piston/cylinder, as shown
in the picture.
- Use the marks you made earlier to realign the preload cylinder
with the shock body.
- Use your press or spring compressor to press the preload cylinder
back onto the shock body, until the snap-ring groove is exposed.
- Reseat the snap-ring in the groove.
- Release the pressure on the preload cylinder. The snap-ring
will hold it in place.
- Re-tighten the set screw in the preload cylinder to make sure it
doesn't rotate.
- Feed the shock back into the bike. Reattach the bolts and
nuts to the top and bottom of the shock. The manual specifies
36.0 lb-ft (50 N-m) of torque.
- Bolt the preload knob into place, using a few drops of blue
Lock-Tite on the bolts.
- Follow steps 4-6 of the linkage installation instructions.
